
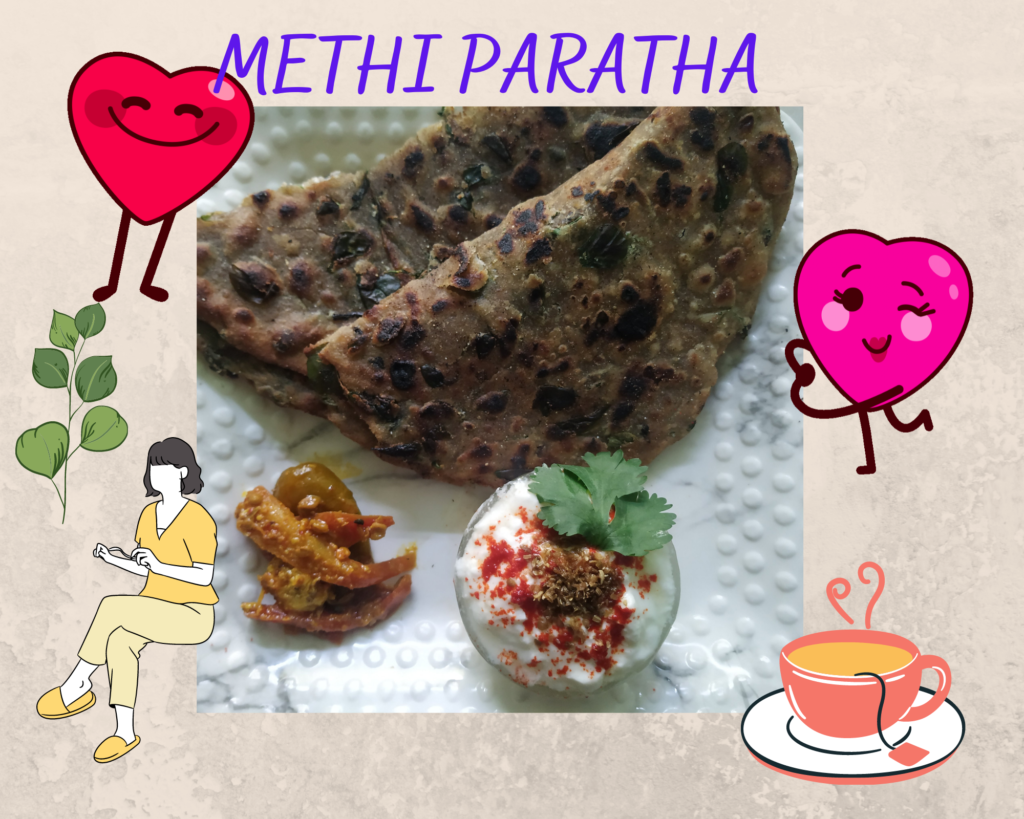

METHI PARATHA RECIPE
Well, I must say Methi Paratha is the most fragrant and tasty paratha I have ever eaten, We love this methi paratha. Methi or fenugreek is an excellent herb that has immense health benefits. Paratha can be of various types, plain and stuffed.
Health benefits of Fenugreek or Methi:
- Methi contains biotin and vitamin A and D.
- It is extremely rich In fibre.
- Methi helps to control diabetes, cholesterol.
- Fenugreek helps in weight loss.
- In Ayurveda, Methi is used to make pain relief capsules.
- It is an excellent hair growth booster.
Fenugreek is a magical herb and if you regularly consume fenugreek, your body will thank you.
Ingredient list of Methi Paratha:
- Fresh fenugreek leaves-One bunch.
- Methi or fenugreek seeds-1 teaspoon
- Whole wheat flour or plain flour(whichever you prefer)-2 cups
- Oil for kneading the dough – 2 teaspoon
- Oil/Ghee- For frying Paratha
- Salt-A pinch
- Sugar- A pinch
- Water- To knead the dough
Method:
Preparation of Methi:
- From the fenugreek leaf bundle, take out only the leaves. You should not take out the stems as it will make the paratha bitter.
- Wash the leaves thoroughly.
- On a tawa, add two teaspoons of oil. Add methi seeds, a pinch of salt and sugar and then you need to add the washed fenugreek leaves. Stir fry them on a high flame so that the water dries out.
- This is my method. I have seen that in this way the paratha becomes tastier. You can add the leaves directly to the flour if you want to skip this step.
Kneading the Dough:
- Add the cooked methi leaves, a little oil to the dough.
- Knead it with very little water.
- The dough should be firm, not soft.
- Keep the dough aside for a minimum of 30 minutes.
- This ensures that all the flavours get infused into the flour.
Rolling the paratha:
- Make round balls from the dough and roll them smoothly between your palms
- Oil your palms slightly so that the dough does not stick.
- You should use a smooth surface while rolling.
- Start rolling with a rolling pin but with a very light hand.
- I have rolled the parathas in a round shape. You can choose the shape you want. You can even make a laccha or layered methi paratha out of this.

Cooking the methi paratha:
- Preheat a tawa.
- Spread the paratha carefully and keep the flame low.
- Do not put the paratha on high flame as it will burn it.
- I usually brush ghee or oil but if you want the paratha to be more crispy you can add one or two teaspoons of oil to fry it.
- I usually let one side of the methi paratha cook first and then I brush oil on that side for a slightly crisp texture.
- While cooking the paratha, please ensure to press the sides evenly or else it will remain raw.
- Evenly toast the paratha on both sides by brushing oil or ghee.
Serving the Methi Paratha :
I usually prefer to eat Methi paratha for breakfast. But I enjoy it with a bowl of curd sprinkled with some red chilli powder and cumin powder. Or else, I eat the paratha with pickles. But my family prefers to have methi paratha in either lunch or dinner with a Bengali style dum aloo. You can enjoy it in any way you want.
I enjoy reading through your website. Thanks!
thanks for your feedback
I like it whenever people come together and share thoughts.Great website,
continue the good work!
thanks for your feedback.
Hey! Thhis is my first comment here so I just wanted tto give a quicfk shout out
aand say I truly enjoy reading through your articles.
Appreciate it!
thanks for your feedback.
Hello, aftger reading this amazing article i am as
well happy to share my familiarity here with mates!
thanks a lot for your feedback.
I pay a visit daily some blogs and information sites to read
posts, but this weblog gives feature based writing.
thank you so much for your feedback